My goodness, it has been a long road with our daughter's bedroom makeover! We are finally at the stage of calling it done, and I'm excited to share the whole makeover with you this week. Today is a look at the fairly epic road to a finished makeover, including a video of the construction phase, and the important lessons we learned during this massive project.
1. Assess the space thoroughly before launching into the project
When you're making-over a child's bedroom, you've got the opportunity to completely transform the space, especially if you're going from a nursery to a 'big kid's room'. At this stage, your child's personality, likes and dislikes will help guide the whole design and creative process a bit more. This is also the perfect opportunity to assess the things that aren't working in the existing space, why they're not working and how you can fix them throughout the project. We sometimes leap into new projects without proper planning, but with this one we had been brainstorming for many months, so were pretty set with our plan of attack.
For our daughter's bedroom, our main priorities were better book and toy storage, and to dramatically increase the wardrobe space by creating a new built-in. Basically, our son's bedroom had double built-in wardrobes and our daughter's had none (as I showed you in this episode of The Organised You TV). So we had to knock through the wall and create a new built-in so there would be ample wardrobe space in each bedroom.
Here's what we started with. You'll notice we'd already moved our daughter's bed in, but still had the cot in here, so there definitely wasn't much room to move!
2. 'Shop your home' for existing furniture and storage pieces
When you're brainstorming what a new room will need in terms of furniture, storage and decorations, I always recommend 'shopping your home' for pieces that could be repurposed elsewhere. For us, this whole makeover really came about when we did a furniture switch with the larger chest of drawers to this slimmer unit from our own bedroom.
Once we did this, there was a much bigger space to work with. We also changed our initial construction plan to ensure the contents of this chest of drawers could be easily accessed. We re-used most of the nursery frames (pictured below) in the new bedroom gallery wall, but just swapped out a few prints.
Shopping the home with the intention of repurposing pieces is a great idea, and can sometimes take your project in a whole new direction!

3. Any amount of time you think a project will take - triple it, especially if you have kids!
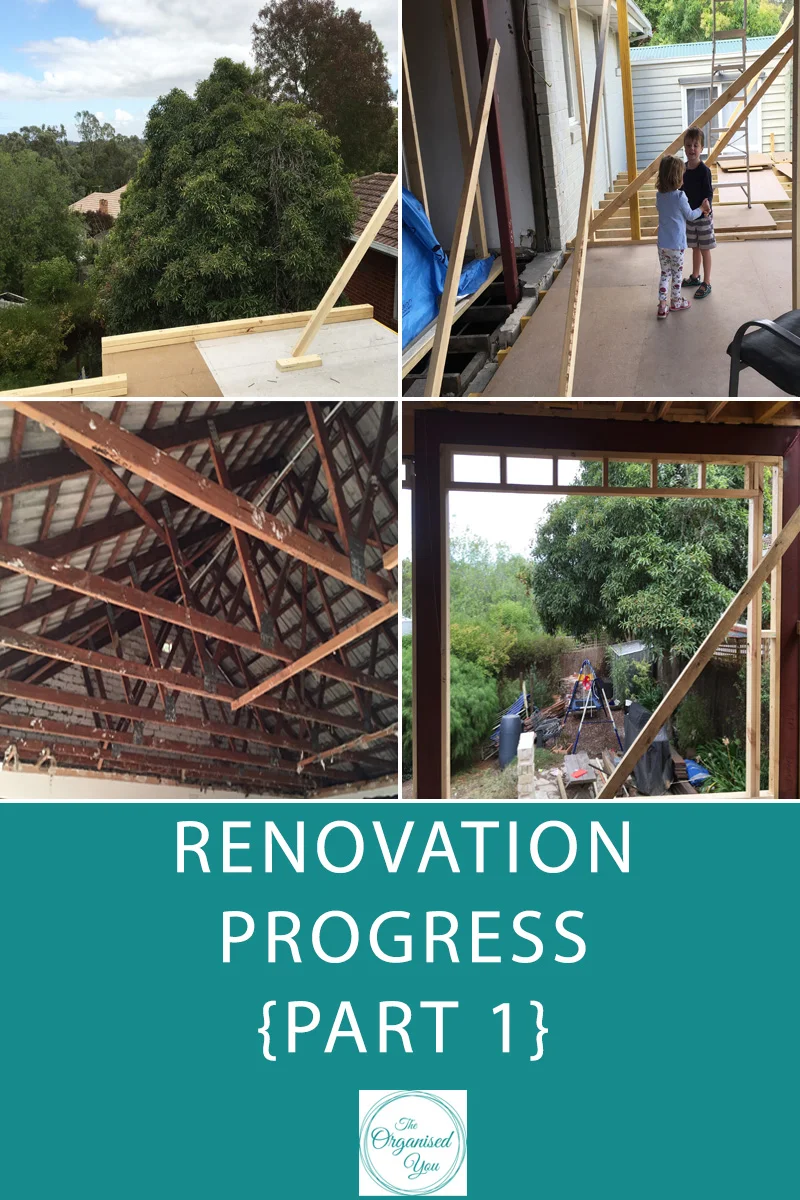
We knew this project was a big one, because of the major construction work involved. We just didn't realize how long it would take! Obviously, with my husband working full-time, it meant he could only build on weekends and some evenings (but couldn't make too much noise of course!). Not only was there the new cupboard to be built, there was also painting, furniture arranging, new pieces to be purchased, decorating and pulling the whole space together. Working around kids and their schedules is challenging, so it pays to be prepared for this going in to save major frustration!
Here's a very quick video of how my husband built the new wardrobe...Stay tuned for the full finished reveal on Thursday's episode of The Organised You TV.
4. One project will always lead to other projects
Of course, once we'd finished our daughter's room and were totally high-fiving ourselves, we then had to face the daunting prospect of completing our son's bedroom - plastering, sanding, re-painting, furniture rearrange, new toy storage and a new bed. Hence why we escaped to New Zealand! Ha. We really did run out of energy, but taking a mini-break before launching back in was a good solution. Now we're through it, we're so happy that both rooms are complete - short-term pain for long-term gain, right?
5. Take the time to investigate different storage pieces that could work in the new space
Something I think I've gotten better at over the years of many, many home projects, is waiting until a room is complete, and everything has been decluttered, before deciding if I need any new storage pieces. Really looking at the space once it's complete, measuring and working with what you have vs what you really want is the best way to avoid over-spending. For example, I nearly rushed out to buy a new bedside table for this room, but my husband suggested re-purposing a shoe-rack that was in our son's wardrobe.
It went from this...
To this, by making it slightly smaller, adding a new top and a quick paint job. Now the perfect fit!
6. If it at first you don't succeed, think carefully about what's not working, assess why it's not working... and try again!
Sometimes you arrange the furniture, and set up the storage pieces, but very quickly realise that it just isn't working the way you envisaged or hoped it would. We thought we'd done okay the first time we tackled this bedroom...
And the second...
But it wasn't until this third time we re-arranged and brought in some new storage pieces that we were really happy to call this space complete (stay tuned for the full reveal Thursday!).
7. Try to incorporate your child's interests, likes and personality into the space
Our daughter is funny, feisty, creative and imaginative, so I wanted to inject some of these qualities into her room with lots of bright colours. This gorgeous quilt from her Nanny was a big inspiration for the colour palette, with lots of blue, yellow, gold and pink in the mix. Finding the storage pieces pictured below (from Adairs Kids) was a great point in the decorating process, as I loved how bright and vibrant they were, just like my baby girl :)
8. Take your time trialling out different options
One of my favourite ways to organise and store kids' belongings is by using a storage piece with divided cubes or sections, like the famous Ikea Kallax unit. Getting the arrangement right can be tricky, but it is well worth your time to try out different options and keep trialling until you get the right combination. Here's a fun look at how I finally got the right arrangement in here!

And one more thing... know when to call it a day!
You could keep decorating and tweaking and adding to any room in your home for months on end, and some people love this process, but when it starts to drag on and you're never really satisfied with how a space looks or feels, it can really get you down. Yes, there are still bits and pieces I'd like to add to my daughter's room - a mirror, a beautiful print, carpet... But at the end of the day for me, I want to look at what we've accomplished and feel satisfied and proud of the job we've done, and the lovely space we've created for our girl.