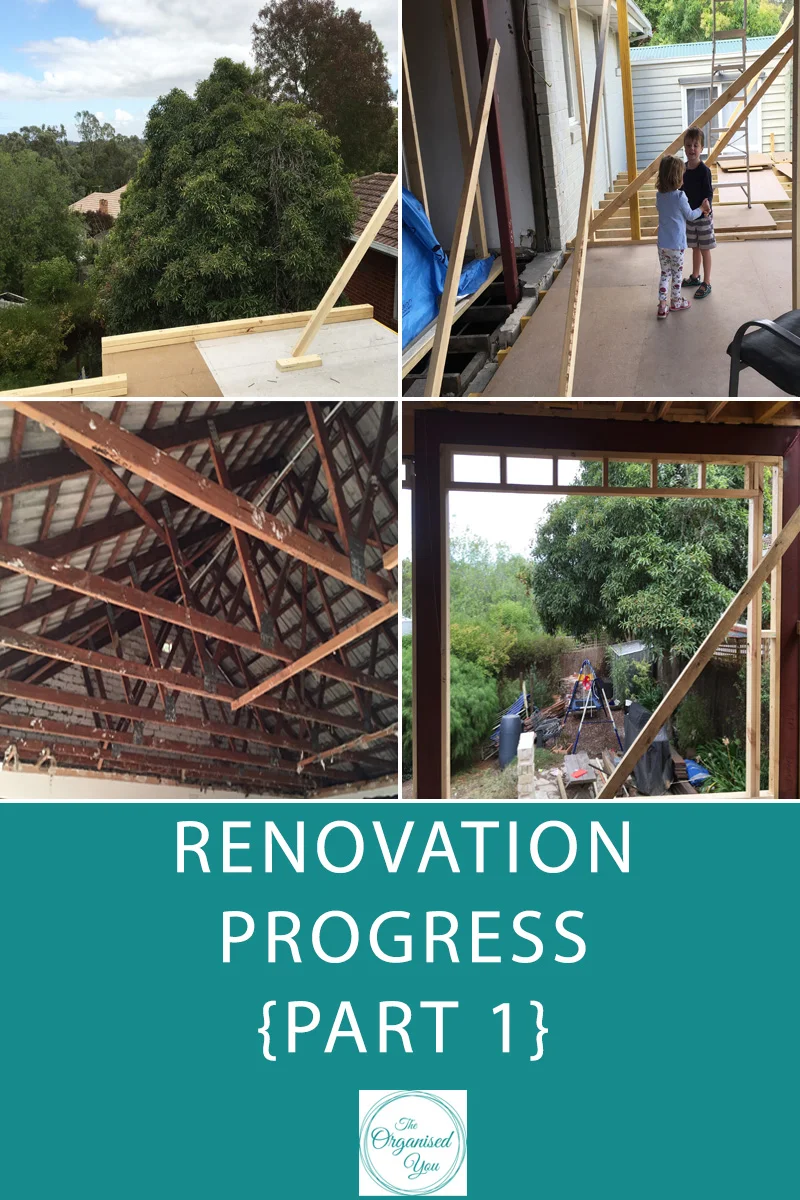

Would you call yourself a DIYer? Are you someone who likes to do home projects yourself to save money, or do you prefer to call in the experts? If you've been keeping up to date with our current home renovation, you would know that we are very much the former - mad DIYers! We are currently smack bang in the middle of some serious painting work on the exterior of our new abode. Over the last 9 years, we have painted both the entire interior and exterior of our house. And now we're changing it all up and doing it again! #crazy.
Completing the painting yourself, especially during a renovation when it feels like your money is flying out the door, really is a massive cost saver. When we compared some of the quotes upwards of $20,000 just for the exterior painting to the cost of some new brushes, rollers and cans of paint, it was completely worth the effort to do it ourselves.
That being said, painting is definitely not a quick process, which is the one thing that would probably hold a lot of people back from doing it themselves. If you can manage to get help (thanks mum & dad!) then it's time to call on those reinforcements. And if you have young kids, like we do, it's also time to call in some baby-sitting favours - we're extremely lucky in that department too, but it sure is hard missing quality family time at the moment. It'll be worth it in the end though!
I'm certainly no painting expert, but as we finish up our 6th weekend of painting the exterior (next up - tackling those beams and vaulted ceilings in the living room), here are some of the best painting tips and tricks we've learned along the way. From our very first [terrible] job of painting over baby-blue window panes 10 years ago, to our current balancing off the scaffolding... we've come a long way baby!
BEFORE YOU START...
When choosing a colour, definitely do not base your final decision off the swatches or brochures from the paint store. Use these to narrow down to your top 3-5 and purchase sample pots to test these colours on different areas of your home. Trying out various areas of your home allows you to see how the paint will look in different lighting. I tried this on our exterior and we ended up going with the top right. Once the first coat was on, it ended up looking completely different and I was really panicking! But now that the 2 coats are on, it's more true to the colour, and I'm finally loving it. Phew :)
On the interior, it is easier to do the skirting and architraves in a semi-gloss in a similar or the same colour as the wall colour (we sometimes do 1/4 or 1/2 strength for a slight variation), because if you drip paint or slightly go over with your cutting in, it won't matter too much
Measure the space you're about to paint (if possible) so you know how much paint to purchase
Go with water-based or acrylic paint over oil-based if you can. It is way easier to work with and less of a pain to clean up (oil-based paint brushes will need to be cleaned using turps)
It's worth investing in quality brushes and rollers, rather than skimping on cheaper ones, so you get the best, most even coverage
IT'S ALL IN THE PREP
Fill any gaps or holes with wood filler (on window and door frames, or old furniture) and apply spackle [poly-filler] on walls with a putty knife. An icy-pole stick is also a really easy implement to work with because it allows you to get into any small nooks and crannies
Use a caulking gun to fill any gaps for weather-proofing (i.e. between weatherboards) or between the skirting/architraves and wall
Sand any rough or filled areas to the smoothest possible finish you can manage. If you rush this stage, you will regret it later as you can definitely notice bumps on un-sanded patches once the surface has been painted
Make sure surfaces are free from dust and cobwebs before you start
Exterior surfaces may benefit from a blasting clean with a power sprayer
If you're painting the exterior walls, you may need to cut back some plants and bushes to access the area to be painted more easily
Hammer some nail holes into the rim of the paint-can so the excess paint that forms a puddle can drip back into the can and reduce dripping down the side of the can when pouring
When pouring the paint out of the can, try to avoid getting the paint over the instructions in case you need to check drying times or specific instructions
Lay down drop cloths or newspaper to prevent making a mess on the floors
Be sure to give the paint a really good mix before you start painting. Use a wire coat-hanger attached to a drill for faster and more thorough mixing
Do not wear your best clothes for this job! No matter how hard you try, you will inevitably get paint on your clothes. I am possibly the messiest painter around, but it's good to be just be able to wipe my mucky fingers on my pants rather than having to go wash my hands mid-job!
DURING THE JOB
Use a specialized paint can opener to remove the lid easily
Pour paint into a small painting bucket (with a handle) rather than lugging around the paint can. Either re-use old containers from around your home, or buy one from the store that comes with a lid so you don't need to pour the paint back in at the end of the session
Don't skimp on the primer stage if you've got raw wood or unpainted surfaces. Primer will prevent the next 2 coats of your chosen colour soaking in and will help the colour last longer
Use a roller for faster and more even coverage on larger surfaces
A paint tray is essential when using rollers. As is a telescopic handle to attach to the roller handle for reaching higher areas such as ceilings, and doing a faster job on walls
Take a damp cloth or old towel along with you to wipe up any spots or splatters, or to quickly clean a dusty ledge
Disposable plastic gloves are great to wear during painting so you don't have to spend ages cleaning your hands at the end
Use painters tape if you're not feeling confident about keeping paint off certain surfaces (i.e. glass) but know that this step will really add to the painting prep time, and it still doesn't always give you a perfect finish
Working swiftly with an angled brush and a steady hand on fiddly areas, such as window frames, is often easier than going slowly with a small brush or taping up all the areas you don't want covered. When we first painted, we taped up all of these windows! Painful much? I've now got my brush technique down pat after a bit of practice
If you do happen to get paint on the glass, either wipe it off immediately with a cloth or let it dry and use a paint scraper to remove it
Spray painting works well on large surfaces, but be sure to wear a mask to protect yourself from the fumes
If it's a hot day, and the paint is starting to get a bit gluggy, add some FloTrol to help it go on nice and smoothly
If you're painting outside in the rain or it's below 10 degrees... then know it will suck. If you're desperate for paint to dry between coats, a hair-dryer can help!
Open roller-windows between coats to prevent 'painting them shut' #guilty

If you happen to be installing new weatherboards, give them a coat of primer and first coat before they go up. Being able to do this was a huge time-saver for us.
MASTER THE CLEANING TRICKS
Only wash brushes in cold water, never hot, to minimize damage to the bristles
Wrap your paint-brush in glad-wrap in between coats or when stopping to take a break, to prevent it from drying out
Give the brush a quick rinse and blot dry with paper-towel if it starts to get really clogged up, such as on hot day. Make sure you dry it thoroughly to prevent paint dripping down your hands when you go to use it again!
Wrap brushes and rollers in paper towel (or toiler paper) after cleaning them, which further protects bristles and prevents them from hardening
Don't bother washing out plastic painting buckets, instead wait for them to completely dry and then peel the paint off in one layer - it's quite satisfying!
Do the same with painting trays. We read a tip to cover trays in al-foil to make for faster clean-up, but found this soaked up a lot of the paint, so we now prefer to just use the 'dry and peel' method
Use a specialized roller-cleaner - it basically looks like a tube that you pull down the roller to get excess paint off and reduce cleaning time
WHEN IT'S ALL DONE
Be aware that the paint colour can look different before it dries completely, so give it some time before you judge... and try to avoid panicking!
Allow walls to cure and dry completely before placing any items against/on them
Painting is such an instant and welcome change that it often makes you want to change surrounding things - for us it's the front door and garage door. We used Photoshop to do a mock up of different door colours to see what looked best, and think we'll probably go with this navy blue...
Any my final tip is to celebrate all your hard work... on the scaffolding with a beautiful view if you can manage it ;) #couldilookanymoreexhausted
Hope you've found these tips helpful! Let me know if you've got any painting tips to contribute, I've still got a lot to go so would love
any more secret tricks.