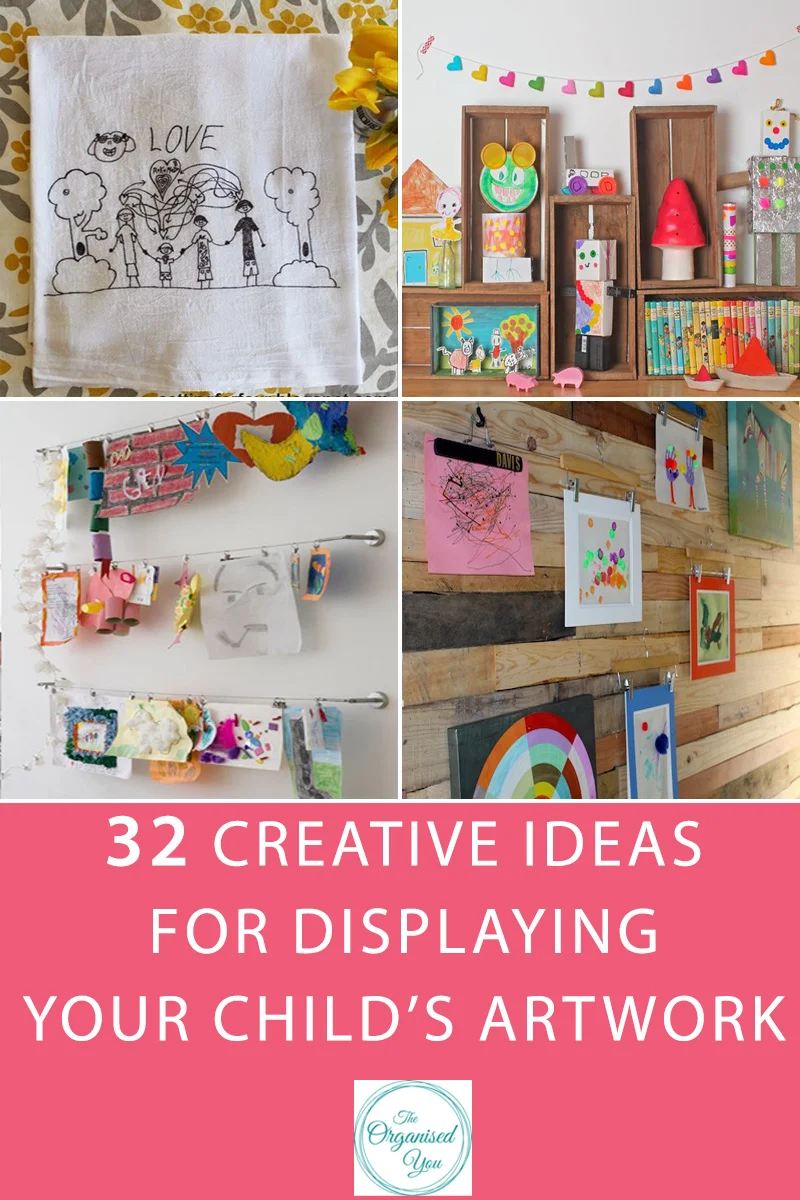
If you have children, you may also have an overflow of lovely artwork gathering in piles around the house - we've all been there! I've only recently fixed the problem in my daughter's bedroom with this cute art display. If you're looking for some ways to display your child's masterpieces, you're in the right place because I've rounded-up 32 beautiful and creative ideas to get you inspired. Some would be super-simple to whip up, while others would require a bit more effort. Deciding on a display for your child's artwork really comes down to available space, organisation and time. I'd love to hear in the comments which one of these is your favourite that you might try in your own home!
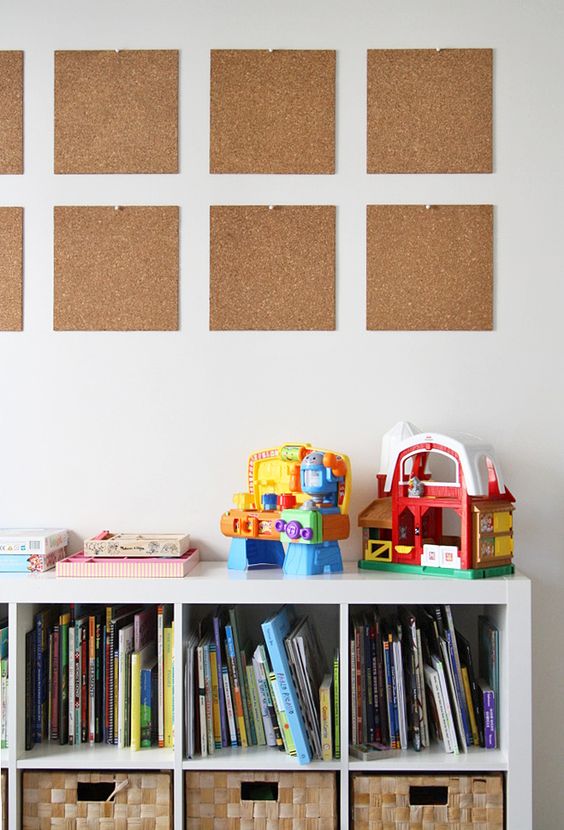
1 | If you've got ample wall-space, a giant cork-board like this one from Young House Love will provide loads of display space for your child's artwork. This one was made by attaching multiple cork squares to wood paneling on the wall.

2 | If you like the idea of cork as a display backing, you could separate out the cork tiles for a clean and stylish look, like this one from Everyday Reading.
3 | If you've got less wall space, a repurposed curtain rod and clip-rings will do the trick, as shown by Good Housekeeping. Wall quotes in a creative space look great and can be easily achieved with wall stickers or decals (like these ones from Etsy).

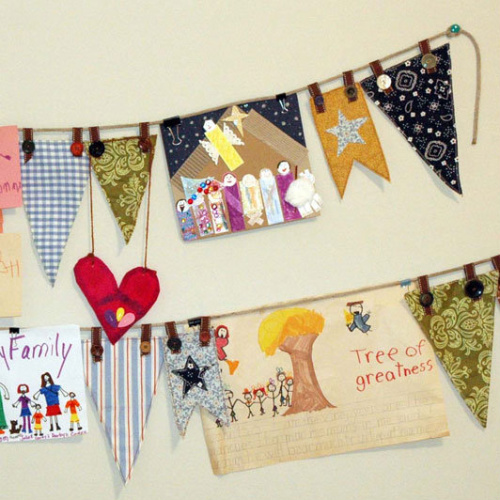
4 | This sweet bunting from Project Nursery mixes up the artwork and beautiful fabric to create an interesting piece that could be displayed anywhere in the house.
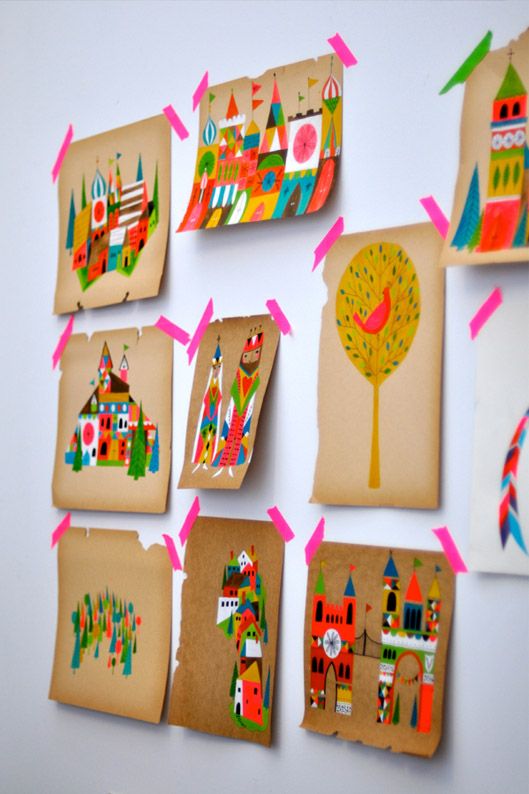
5 | Possibly the easiest and quickest ways to display artwork is by sticking pictures straight on the wall with washi tape, like Lisa Congdon has done here. Washi tape is awesome because, unlike sticky-tape, you can un-peel and re-stick it with ease as it won't leave any sticky residue or damage the walls. It's definitely a favourite of mine!
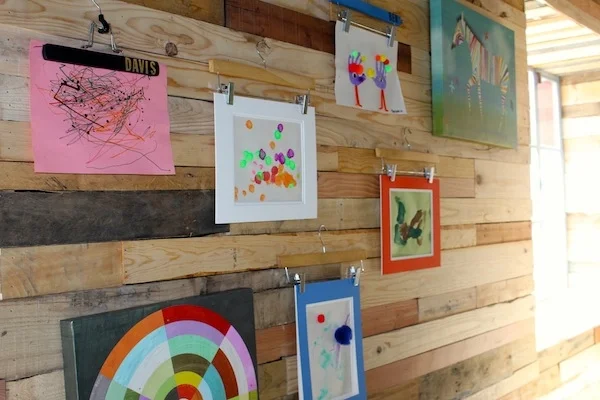
6 | Honestly uses clothes hangers as a unique and stylish solution for displaying kids' artwork. The hangers could be painted and personalized with your child's name, or left natural. I think the blend of the two looks so great on this wood-panelled wall!
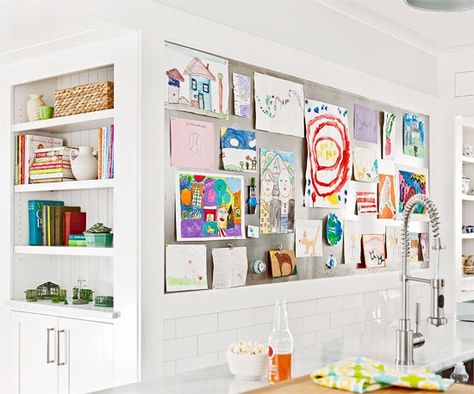
7 | A simple display space in the kitchen allows lots of artwork pieces to be shown off. With the 3 wooden panels and large metal clips, it would also be a pretty easy project to whip up in a weekend (from The Idea Spot).

8 | Here's a similar idea and placement for a display wall, but this one from Style files uses wire and clips that really allow the artwork to stand out.

9 | This is a lovely idea for giving each child their own individual space to show off their latest works. Simply Organized hung these framed and initialled cork-boards in the playroom for each of her children to proudly pin up their art.

10 | Artful Kids painted a whole wall with blackboard paint and drew frames to fit each art piece. These frames could easily be changed with different sized artwork by simply rubbing off the chalk and drawing a new frame!

11 | Or you could paint frames straight onto the wall, like this gorgeous creative space from Childhood 101! I love how this whole area is dedicated to creating, with the gallery wall, hanging wire, blackboard, crafting table and art supplies. Such a sweet space!

12 | Here's another super-creative space from The Imagination Tree, which is the perfect spot for storing art supplies and tools, as well as providing plenty of room to showcase the latest artwork. I love the old-style desk and colourful cardboard lettering.

13 | This little nook from Censational Girl uses gallery shelves to display framed artwork. Using similar frame and matting colours means you can create a more cohesive look to your display that ties in with the rest of your home decor.

14 | If you're super-organised, you could photograph each of your child's artwork pieces throughout the year (or all at once at the end of the year) and create a photo book (like this one from Zig and Zag). This is a lovely way of capturing every memory, without having to worry about finding display space in your home.

15 | Hands on as we grow had a similar idea, but instead of a book, she created unique photo collages to show off the different pieces of art created by each child.

16 | Little Moth scanned her child's artwork and created mini-versions of each piece which were then arranged and displayed in a large frame.

17 | Or you could get all the mini-pictures put onto a canvas, like this one from Etsy, to create a lasting memory.

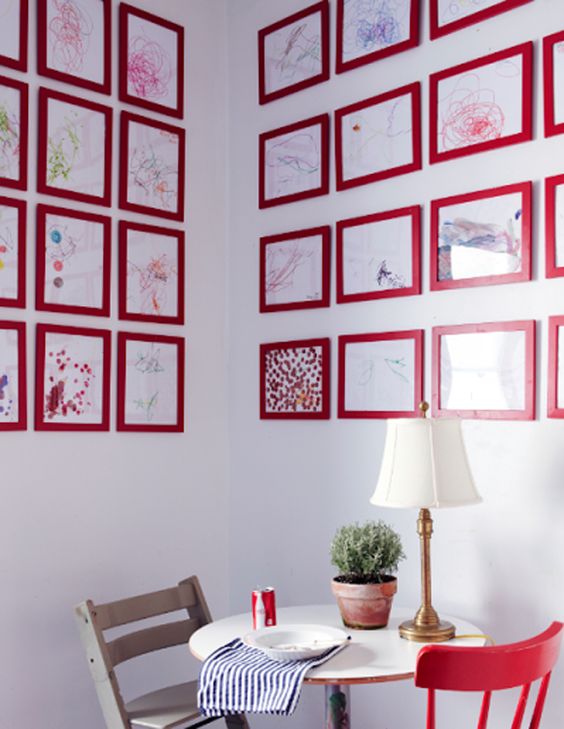
18 | Using cheap and colourful frames (like these ones are from Ikea) makes it easy to switch out the different pieces of artwork and create a unique display in any room of the house (from Little Green Notebook).
19 | This idea from Life Instyle is just so cute and colourful. A gorgeous way to show off those bigger pieces of artwork that can't be hung on a wall, using wooden crates.

20 | This entryway from Home is Right is all the more special and inviting with framed art pieces - the perfect spot to show off your child's latest masterpiece.

21 | Or maybe you'd prefer to display your gallery wall elsewhere, like the stairwell, as shown by House of Turquoise...

22 | Or the hallway (like this one from HomeBunch). Using the same type and colour of frame will provide a more cohesive look to your gallery wall (see how we created our own gallery wall of photos in this video).

23 | A Girl and A Glue-gun was my own inspiration for my daughter's art display, but hers is way more creative than mine! I love that giant pencil, the paintbrush and the inspirational art pieces intertwined with her daughter's art pieces.

24 | This simple wire and clip display from Etsy is made all the more special with a giant blackboard underneath, and the colourful paint palette and quote above.

25 | Playful Learning created a unique collage by using a craft punch and card-stock to cut out circles of her daughter's artwork pieces which, when put together in a frame, make a beautiful piece of art.

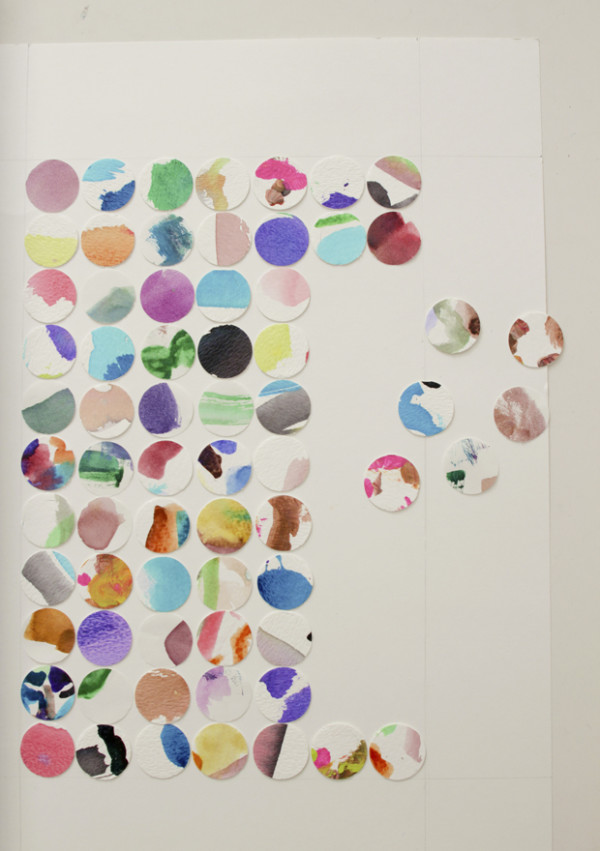
26 | Kate Bullen used the same method with a triangular shape. Which do you prefer? I love the colours in both pieces!

27 | Clean & Scentsible created a designated spot for her children's art using painted clipboards, which really pop against the wall colour! The clipboards make it super-easy to switch out the artwork regularly, as opposed to photo frames which are a bit more of an effort.

28 | But here's a frame that's super-easy to work with! The front latch allows you to open it from the front and either switch out the art, or add another piece. It holds and stores up to 50 pieces! So clever.

29 | Here's an another cool idea from Artful Parent using glassless frames which can be filled with several pieces of art, or just one special masterpiece. The contrasting colours of the frames against the bright wall colour provide a very creative vibe to this space.

30 | How Does She made-over some old frames with a fresh coat of paint, and attached chicken wire to the back of others, to create a unique fridge display. The frames are not only a perfect holding spot for art work, but also invitations, photos and magnets.

31 | Rather than using the side of the fridge, Marker Girl took up an entire wall with a giant metallic piece which proudly shows off her children's artwork.
32 | Artwork can even be transferred onto a tea-towel for a lasting memory of a special piece. Isn't this picture from Setting for Four so lovely?


![7 tips for a [relatively!] stress-free kid's party](https://images.squarespace-cdn.com/content/v1/534bbd08e4b0b891fcd7f20a/1460954330326-C1NI8RPWIDC1S0SFJNYD/party.jpg)